How To Install A Wooden Privacy Fence

Your yard can be a sanctuary—a place to go where you can enjoy yourself and escape from the rest of the world. If you have children or pets or just enjoy a sense of privacy, a wooden privacy fence can help you create your own little corner of the world.
If you aren't sure how to install a wooden privacy fence, it's a big job, but it's one that you can DIY with the proper planning and tools. If you want to save money, the sweat equity of installing a fence yourself can dramatically reduce the cost. It's hard work that really pays off in aesthetic appeal and value for your home.
Preparing for Your Privacy Fence Project
Despite the labor involved in installing a wooden fence in your yard, planning is the most critical step. There are some crucial factors you should consider before purchasing the materials and designing your fence. The best way to successfully install a fence is to take the first step in making sure your fence meets codes and fence restrictions.
1. Explore Local Codes and Obtain Any Needed Permits
Did you know that local codes may have very specific requirements about the height, materials, and even the style of your privacy fence? By ignoring these codes, you could end up with fines, or worse—you could be required to alter or remove your new fence altogether.
As you consider the fence, explore local municipality rules and codes. Secure any necessary permits. Many local government offices require that homeowners pull a permit before they begin the project. By getting the necessary permits in place, you'll rest assured that your fence plan complies with local ordinances. You'll also avoid future complications and legal issues should you sell your property. You may also want to contact local utility companies to ensure you can dig in your yard safely.
2. Talk to Your Neighbors
They say good fences make good neighbors, but a dispute over fence plans can quickly erode that neighborly goodwill. Before you break ground on your fence, discuss your plans with the adjacent property owners. This extra communication will prevent disputes and help ensure the new fence doesn't accidentally encroach onto their property.
Consider shared boundaries and future maintenance. If the fence will be placed on a shared boundary line, discuss who will be responsible for the costs and maintenance responsibilities. Should you need to stain or paint the fence each year, be sure you have permission to venture onto the neighbor’s yard as needed.
3. Determine Correct Property Boundaries
Review your property deed. Typically, deeds will have details and information about your property's boundary lines. You may need to hire a surveyor if you cannot find the correct information. Although it can seem like an extra step, a surveyor will help prevent legal disputes about the property lines (and ensure there are no tricky questions down the road).
Planning & Designing Your New Privacy Fence

Once you've cleared all the legal and regulatory hurdles, you are ready to begin planning and designing your new wooden privacy fence.
How much is a privacy fence? It all depends on your property's size and the materials used. Here's a general breakdown:
Material Costs: depending on the type of wood, prices range from $3 per foot for pine or cedar up to $18 or more for high-end woods like redwood. Pressure-treated wood will withstand the weather.
Height: A privacy fence is usually between 6-8 feet tall. Generally, the taller the fence, the more expensive it will be due to additional material costs.
Labor: Since you plan to DIY your wooden fence installation, you will save on labor costs but still need to pay to pull the permit. You may also need to pay for a surveyor to assess the property lines, and you may need to pay for additional professional support during the installation. You may also need to pay for the removal if you have an old fence.
Additional Features: If you want special features like decorative designs, gates, or custom shapes to accommodate uneven land, it will add to the cost of your fence.
Overall, a basic wooden fence will range between $10-20 per foot, assuming you do the labor yourself. There are additional tools and materials that will add to the average cost as well.
Once you’ve set your budget, you will need to choose the materials. Weather-resistant wood like cedar is a good but affordable choice. For harsher environments and winter weather, you may want to choose a durable wood like redwood.
Design the fence and decide on the height (refer to local codes), style, and layout. Consider how the fence will blend into your yard and complement the look of your home. For example, a rustic cottage fence may not blend in with sleek, modern-style neighborhood architecture. While you want the fence to be eye-catching, you don't want it to be the main focal point of the property.
Styles of Privacy Fences

When it comes to wood privacy fence styles, you have a wide range of options. Each fencing style offers a unique aesthetic and a different level of privacy. Here are some of the main options to explore:
Solid Board Fence: A solid board fence is made up of tall, closely spaced boards for complete privacy. This straightforward design creates a wooden “wall” for seclusion and noise reduction.
Lattice Top Fence: A lattice top fence is a traditional solid board fence with a lattice running across the top rail section. The lattice adds a decorative touch that allows light to filter through while still maintaining privacy.
Dog-Ear and Stockade Fence: A dog-ear fence is very similar to the solid board design, except the top corners of each board are angled, creating a "dog ear" effect. For the stockade fence, the tops of the fence panels are shaped into rounded pickets. This type of fence is popular because of its decorative simplicity.
Shadow Box Style Fence: The shadow box style fence is also referred to as the “good neighbor” fence. It features alternating boards on either side of a central rail. A shadow box fence offers privacy but still provides airflow and some partial viewing at an angle.
Horizontal Slat Fence: Horizontal slats are a modern style that offers a sleek, contemporary look. The slats run between the top and bottom rail. Like vertical boards, you can place the slats close together to create more privacy.
Board-on-Board Style Fence: Board-on-board fences feature overlapping vertical boards mounted on both sides of central rails. This design creates an impenetrable barrier with plenty of insulation from sound and high levels of privacy.
Beyond these fence design options, there are many other possibilities for custom fence design. Boards can be placed in unique patterns, and styles can be combined. Some folks also incorporate other materials, like metal and stone, in their fencing design. You can also stain and paint your fence to match or complement your home’s exterior.
When you choose your privacy fence style, consider the level of privacy and aesthetics, as well as the maintenance requirements of the fence design and materials. It's important to make sure that the style is complementary to your home and landscape. Of course, it's also crucial to ensure that any design fits local building codes, HOA regulations, and other neighborhood restrictions.
Gather Tools and Materials to Build a Fence

When you decide on your fence materials and design, it's time to start digging! Depending on your property size, a fence installation can be a big job. Plan for at least a few days of work. It's a job that's much easier with multiple helpers, too. Enlist a family member or a friend to assist with the fence installation project.
Here are the most common tools needed for building and installing a wooden privacy fence:
- Stakes
- String
- Tape measure
- Posthole digger
- Hammer
- Saw
- Level
- Drill
- Fence posts
- Fencing boards
- Concrete mix
- Container for mixing concrete
- Nails and a nail gun
- Any decorative items
- Work gloves
Installing a Wooden Privacy Fence

When you’re ready to begin the wood fence installation, gather all your necessary tools. Choose a day when the weather is pleasant.
Step 1: Mark Your Fence Line
Refer to your deed or property survey. Use stakes with string to create a straight line between fence rails, outlining exactly where the fence will go. You'll want to ensure the string line is level, straight, and follows your property line.
Step 2: Dig Post Holes and Set
Using the posthole digger, dig deep, even holes for the posts. Depending on the frost lines and the fence height, you will want to dig holes 24-36 inches deep. Once the post holes are set, you'll place the posts into the holes and surround them with concrete, following the manufacturer's directions. Make sure that the posts are completely level, properly spaced, and aligned.
Step 3: Attach the Horizontal Rails
Next, you'll need to install the horizontal rails between the posts. Typically, the rails will run across the fence's top, bottom, and/or middle, depending on the fence design. Secure the rails firmly using nails. The horizontal rails should also be level.
Step 4: Install the Fence Boards
When the rails are installed and evenly spaced, you can then attach the fence boards. Attach the boards carefully and slowly, ensuring each one is level and properly secured.
Step 5: Sand and Stain the Fence
Once you’ve installed the fence, you can sand, stain, or paint the fence as preferred. Add any decorative finishing touches to the fence as well. It’s a good idea to use sealant or stain to protect the wood from the weather it may face outdoors. You may also need to apply filler to any nail holes for an even, professional finish.
Step 6: Post-Installation Care and Inspection
Some cities may require a final inspection of the fence post-installation to ensure it complies with local codes. Follow up on your local regulations to make sure you're taking the necessary steps.
Once your fence is installed, you’ll need to keep it well-maintained with regular staining, sealing, and repairs. Typically, a fence should be sealed and stained every other year, depending on weather, wear, and tear. If you keep your fence up regularly, it will last for many years, creating a sense of privacy and tranquility in your yard.
Get Everything You Need for Your Fence at Do It Best
By following the above steps (and paying careful attention to local codes, height restrictions, and property boundaries), a new wood fence is a satisfying DIY project for any homeowner.
A beautiful privacy fence will boost your curb appeal and help you maintain good relations with your neighbors, too. You'll create that much-needed feeling of escape and peace right in the comfort of your backyard.
If you’re ready to start building a wooden privacy fence, Do It Best can help. We have all the supplies you need to build a solid, long-lasting wooden fence that you’ll feel proud to show off!
Related Articles

How Does the Big Green Egg Work?
Wondering how the Big Green Egg works? Discover the full potential of outdoor cooking with this guide to the Big Green Egg from Do it Best.
Learn more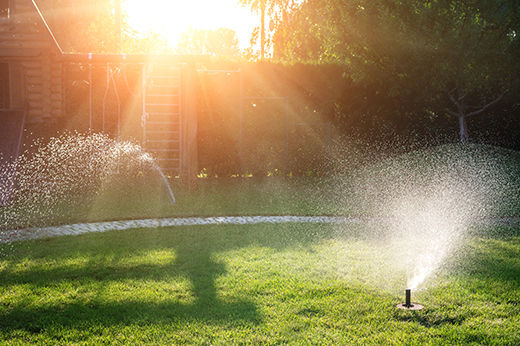
Types of Sprinkler Heads for Lawn and Garden Irrigation
Looking for the right sprinkler head for your home’s underground irrigation system? Find the perfect one with our guide to sprinkler head types.
Learn more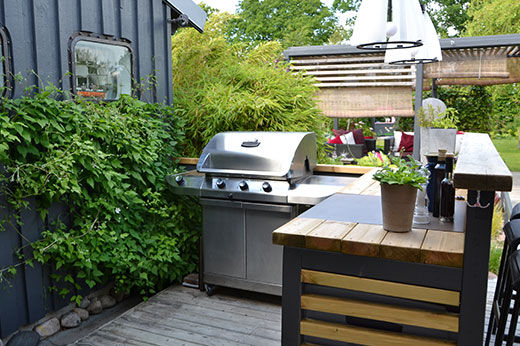
Elements of a Great Outdoor Kitchen
Seven items to add flair and excitement to your next backyard barbecue
Learn more

How to Aerate Your Lawn
Learn how to easily get your yard in tip-top shape for the spring season
Learn more